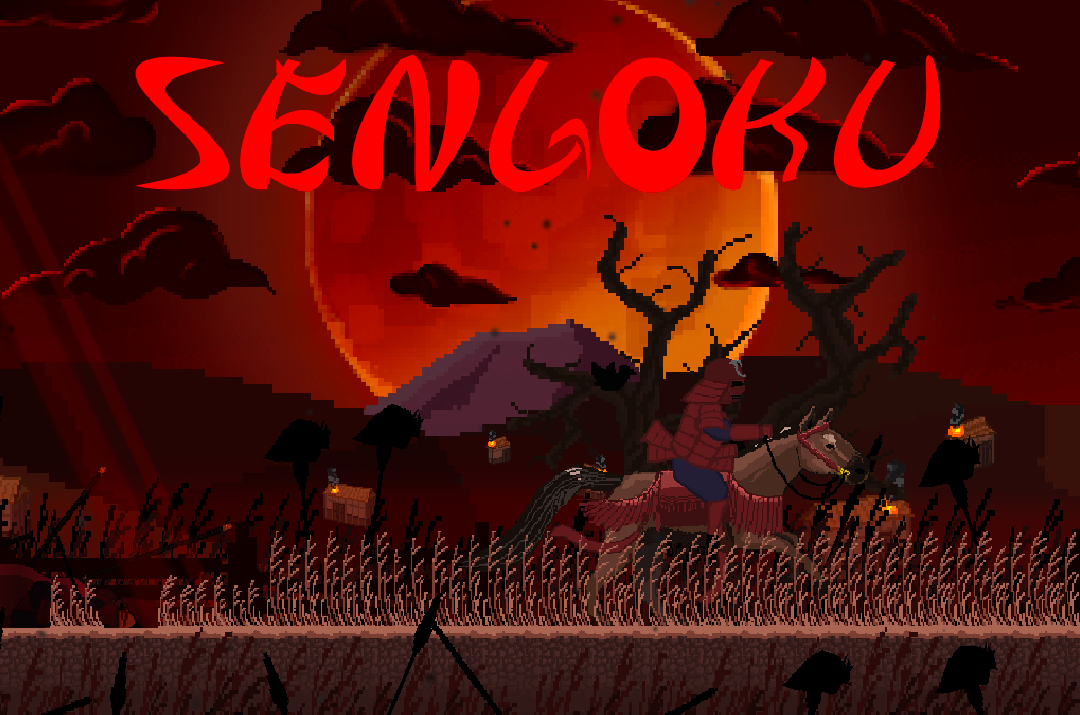
Sengoku
Sengoku Devlog 12
Sengoku Devlog 12
Intro:
It has been a while since our last devlog, but the progress on Sengoku continues! A lot of new things have been added into the game, with version 1 of our first world in the game, the City, completed and ready for the numerous iterations it will most certainly undergo after play testing. We also now have 2 more team members, Ellen and Kaylee, who are taking on the massive task of making the various art assets needed to spice up our levels and mechanics! We got a lot to share regarding the work done this month, so lets dive right in!
The Results for this update:
Here is a game play video of level 3, from world 1, the city! It gives a brief visual summary of all the work done this month, and is the product of a combined effort between all 4 of us! If you are interested, check out below for a more in depth description of how it all came together!
The new additions:
The collapsing platforms:
The game now has platforms that can collapse, something that the first version of this game did not have. There are 3 variants, a single tile collapsable tile which only involves 1 tile breaking, a simultaneous tile collapse platform in which all the tiles start and finish disintegrating at the same exact time, and a sequential tile breaking platform where the tiles start breaking 1 by 1 starting on the side that the player landed on. All of these platforms make use of the same particle effect that also bursts into more rocks upon hitting the ground. The speed on the sequential collapsing platform might also be increased slightly. The main objective with these platforms is to get the player moving, which can help us intensify our platforming challenges in scenarios where the player must jump from floor to floor over a spiky or fiery region below. Below is a video showing all of these collapsing platforms in action:
New NPCs:
The NPC designs and animations (Jon):
Jon did all of the designs and animations for these new npcs, all within the pixel art drawing program called Aseprite.
The guard npc, has a cape flutter animation that is looped in game to give it a warrior like look. These are the guards that greet the player as they enter the other castle they went to in hopes of getting support to retake their city. Here is what these guys look like:

The father NPC is one of our important NPCs, as he will have a crucial part later on in the story. For this npc, Jon had to animate a walking cycle, and idle cycle. The father is also designed to look slightly like the main character samurai, but with more decor since he is a wiser and more experienced warrior. For the intro level, this father npc will serve as a way of telling the player the main controls of the game, while also conveying bits of our story. (See video below called father NPC to see how this all turned out)
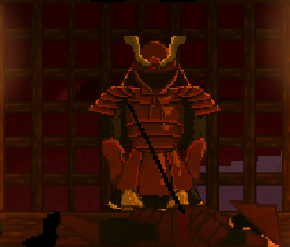
The last NPC we added this month was the lord of the castle the main character travels to. This NPC will greet the player at the very top of the castle, and will serve as another important part of our story in leading the player to the first boss fight of the game: the ivory champion. For this NPC, Jon had to animate a moving head cycle, since we wanted this lord to look at the player while the player battles the ivory champion, sort of the way that the devil, from end of Cuphead, does, or the way Godseeker, in Hollow Knight, does while you battle through the Pantheons. Below is a video showing that animation in action inside of Aseprite!
The Programming (Diego Avena):
A couple of the NPCs needed to have some more special behaviors than just the normal npcs we had in the first version of the game. For example, the father npc needed to be able to move left or right out of the camera view after delivering dialogue, and the Lord of the castle the player travels to needed to be able to move their head in order to look at the player as they battle the Ivory champion.
For both of these, the process was really simple since all that was required was an extension from a base script I already had. The movement for the father NPC was also extremely simplistic: the father can only move left and right, there will never be any obstacles in his walking path, and as soon as he exits the camera view, just despawn him.
I will say though that the lord head movement behavior was a little more interesting to program. In order to program this behavior, I used 2 arrays, 1 array stores all 3 of the move left head frames, and the other array stores all 3 of the move right frames. I then defined a total of 7 regions that the player can be in that pertain to a specific head twist sprite in the array. 3 of those regions belong to the left side, and 3 of those regions belong to the right side. When the player is in the middle region, than this means the player is standing right in front of the lord, so this would correspond to using the default head sprite. Below is a diagram of how this region system looks like visually:
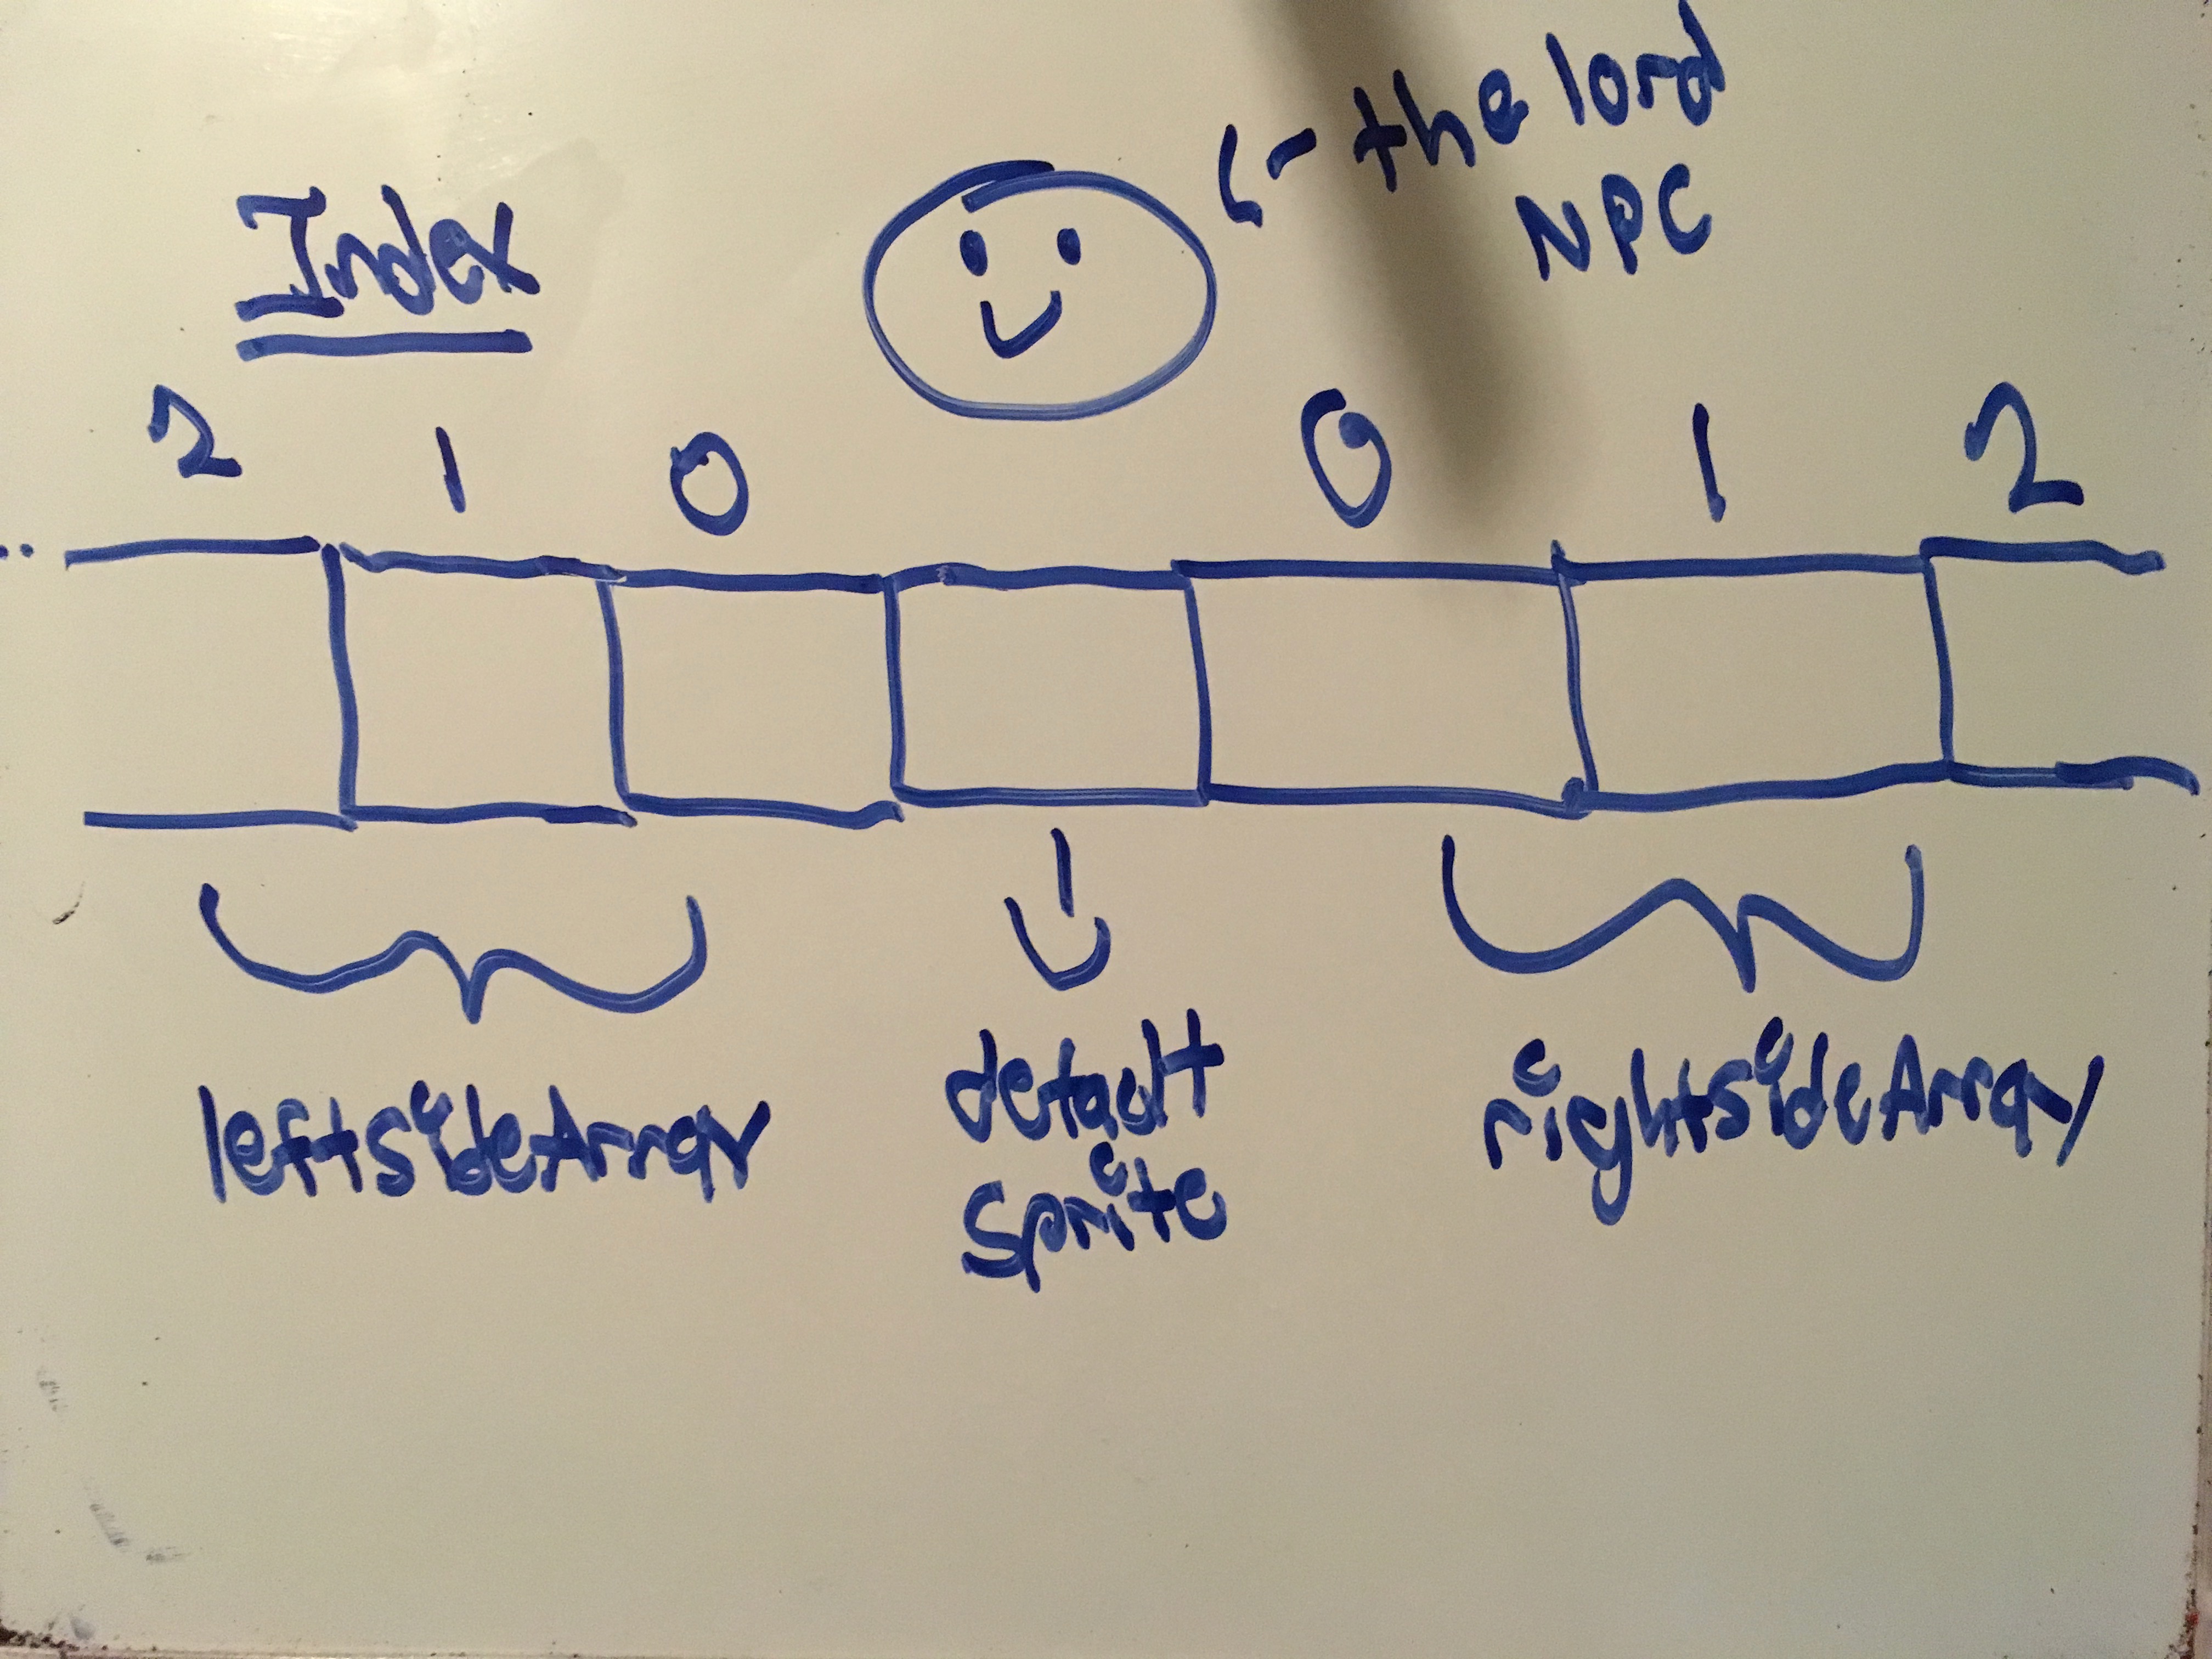
As seen in the image above, if the player is on the left side, within the bounds of the region with index 0, then this means use the sprite at index 0 inside of the leftSideArray. If the player is in region 2 or beyond, then this means use the sprite at index 2 of the left side array. This is the same idea for the right side. This was the basic idea I used to implement this head movement behavior.
Below is a video of the father NPC in action! If you want to see the lord NPC in action, checkout the video in the Ivory Champion Boss fight section!
The Horse:
At the end of level 3, the main character must leave their home/city and begin their search for reinforcements. We wanted to make the entire exit sequence a type of sad and at the same time heroic part of our story, so we decided on adding in a horse that the player can ride on through an open battlefield that is littered with the corpses. Here is a basic outline of the work undertaken to get this part of our game working:
The animations (Ellen - Horse design and animation cycles with no player yet, and Jon - put the player on the horse):
The horse design and animations without the player riding on top were completed in Photoshop by Ellen! One of our new artists on the game! There were a total of 2 animations made, each with 4 frames: an idle animation and a gallop cycle. The horse was also drawn at about the same size that our initial main character, the red samurai, was drawn at, in order to help maintain a consistent look between the 2. The video below shows what those animations looked like in game:
After the horse without rider animations were completed, Jon then had the task of taking the 4 frames of the gallop animation and adding the main character on top. This was done by importing the sprites Ellen drew in photoshop into Aseprite, rescaling the images in such a way that they are all about the same size, and drawing the player animation cycles on top of the horse. The same cycle was also undertaken for the mount and dismount animations (see the videos below):
The sounds (Jon):
The horse sounds themselves were collected by Jon. A total of 2 sounds were collected: a sound which plays when the horse just starts running, and a sound for when the horse runs.
The programming (Diego):
Once the first horse animations were completed, I started putting together a horse movement script. The horse movement script was a way more simpler than our other character movement scripts because the horse is only able to move left and right. The challenging part was coming up with a way so that when the user presses the move left button, or move right button, the horse gradually speeds up. If the horse instantly ran at full speed, it would not feel right.
I also put together a little sound script that controls 2 sounds the horse makes: a getting ready to run sound which plays whenever the player has just started moving the horse or starts moving the horse in a different direction, and a gallop sound that plays while the horse runs. The challenging part in terms of this script was figuring out the exact conditions that mean the player has just turned the horse around and is moving in an other direction. Luckily though, every movement script extends from a base class I made that has 2 booleans called characterAttemptingToMoveLeft and characterAttemptingToMoveRight, and through these I was able to easily determine that condition. The way this worked is this: when the horse moves left, characterAttemptingToMoveLeft gets set to true, and characterAttemptingToMoveRight gets set to false, and vice versa. The important thing though is right before I update these variables, I run the direction change check that looks like something below:
if (moveLeft && characterAttemptingToMoveRight) {
//horse wants to move left, but since character attempting to move right is true, then this means the horse is changing directions,
//which means I need to play the getting ready to run sound again, and also do the gradual speed up
} else if (!moveLeft && characterAttemptingToMoveLeft) {
//horse wants to move right, but since character attempting to move left is true, then this means the horse is changing directions,
//which means I need to play the getting ready to run sound again, and also do the gradual speed up
}
This is how I was able to determine the conditions for when the gradual speed up should occur again and for when the getting ready to run horse sound should play again, as a result of a direction change.
Below is a video of the horse in action in the game with all of these things (animations, movement systems, sounds, sound sytems) implemented:
The Reactive grass for the open plains:
The grass tiles (Kaylee):
The design and animation for the grass tiles was done by Kaylee, inside of Adobe Photoshop. They are each on a 32x32 cell, and there are 2 variants: a short grass variant and tall grass variant. We also wanted to make the grass sway to simulate a windy environment, and on top of this, we also wanted to make it so that the grass gets pulled in the direction the player is moving in, so both the tall grass and short grass variants contain several frames for animations like the idle cycle, the push left cycle, the retract left cycle, etc. Check out the video below to see all these animations in action inside of Unity!
The reactive grass system (Diego):
The programming for the reactive grass was one of the most challenging things to do this month, besides the programming for the Ivory champion. Basically though, the way it works is I used 2 arrays: an array that contains all of the push left sprites, and an array that contains all of the push right frames. I then used the width of the grass tile in the game to define the region the player must be in for this grass tile to react, like this:
leftBoundOfTile = xlocationOfTile - (widthOfTile / 2)
and
rightBoundOfTile = xLocationOfTile + (widthOfTile / 2)
If the player is within this region, then it can be said that the grass tile needs to start reacting to the players movement because the player is over it, but in order to determine just how much the tile should be pulled, for example, in the left direction. If the player was all the way on left side of the this tiles region, then this corresponds to the final index in the pushLeftGrass arrays, which is the max pull left sprite. As the player walks into the region from the left, then this corresponds to smaller indexes in the push left array, which maps the to sprites that are pulled less and less left, which in the end, allows the grass to react to the player movement. Again, this is just sort of the rough basic idea for how I got this to work, but understanding this allowed me to program the interactive grass system with greater ease. Below is a video of the reactive grass system, combined with Kaylee's sprites, in action!
Level design:
Level outlines and sketches (Jon)
Before diving into the actual engine and laying out our level, we first drew out each and every level on paper, by hand. The task of drawing every level for world 1, the city, was left to Jon. He drew up sketches and plans for 4 levels: The castle keep, the castle grounds, and city, and the other castle level with our first boss fight. After completing these sketches, Jon then did the prototype layout for each of these 4 levels inside of Unity, using simple box colliders with a sprite renderer component on them. After some play testing, the next step was to tile the skeletons of these levels up, another massive task due to the high amount of details we wanted to capture from actual Japanese castle and home architecture of the era our game is set in. Below is a video of the sketch Jon drew for level 1: the castle keep.
Level tiling and polishing (Jon and Diego):
Jon did the tiling for 3 out of the 4 levels, and I did the tiling for the city level. One of the main challenges with the tiling was laying it out in such a way where the background does not make it impossible for the player to see their in game character. To counter this, we made use of Unity's new 2d lighting system, and also made it so that the rgb values on the background tilemaps were set to values below 150 so that they are less bright. Overall, we think the lighting really helped to put things into perspective: the backgrounds actually look like they are in the back, and the foreground platforms actually look like they are in the front, protruding out for the player to step on. There is still a lot of playtesting the levels will go through though and we also plan on cleaning up some of our tile work, since we had to work fast this time around, but we are super happy with the outcome. On top of that, the new tilesets also capture a lot of the details that can be found in real Japanese architecture from the Sengoku era! Below is a video of one of our lighting tests:
The Ivory champion boss fight:
There is a ton more to talk about still, but to keep things short, from here on out there are only quick bullet points, followed by screenshots and vids, of these new features!
- Programmed by Diego Avena, took about a week to fully implement
- All animations and the design for the ivory champion were done by Jon, inside of Aseprite!
- Background art is from the castle tileset Diego drew over the past summer
Here is a vid of the fight without lighting, the final lord npc, and sounds added in:
And here is a vid of the current sound implementation progress made on this boss fight:
The Red Sky Background:
- We went with a red sky for the background of the city to make it seem like a much more hostile environment
- The red clouds and sky were designed and drawn by Kaylee
- The orange moon and background mountain that is Mt Fuji was drawn by Ellen
- The cloud movement system, along with the moon rise system, was programmed by Diego Avena
The red sky itself went through several versions. Below is the very first version Kaylee drew:
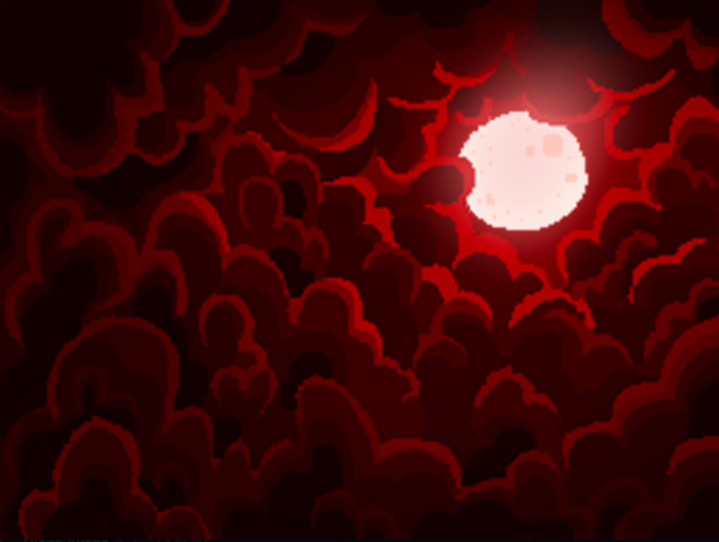
This looked epic, but we wanted to go with something a little less intense, with clouds only in the top layer and a clear red sky in the bottom half, since the player would not be high in the sky during world 1, leading to the version seen in the video below:
Other new art assets:
There are some other cool new things we added in to, like:
- Crows that are always near dead bodies throughout the castle and city levels
- Drawn and animated by Kaylee
- Fly away behavior programmed by Diego
- Sounds collected by Jon
- Breakable crates and platform crates
- Drawn and designed by Ellen
- Breaking system and platforming system for the crates programmed by Diego
- Breaking Sounds collected by Jon
- Castle background props like spear racks and armor racks
- Drawn by Ellen

- Fire sprites
- Drawn by Kaylee
- Particle system created by Diego
- Fire sound collected by Jon
- New ambient sounds:
- Collected by Jon
- Sound trigger system programmed by Diego Avena
- Reactive water
- Programmed by Diego Avena, base code came from a tutorial I found here:
- I then used a series of line renderers and add in a sin wave movement to get a active, pixelated water look
- Sounds collected by Jon
- Programmed by Diego Avena, base code came from a tutorial I found here:
- Background fighting animations
- Designed and animated by Jon inside of Aseprite!
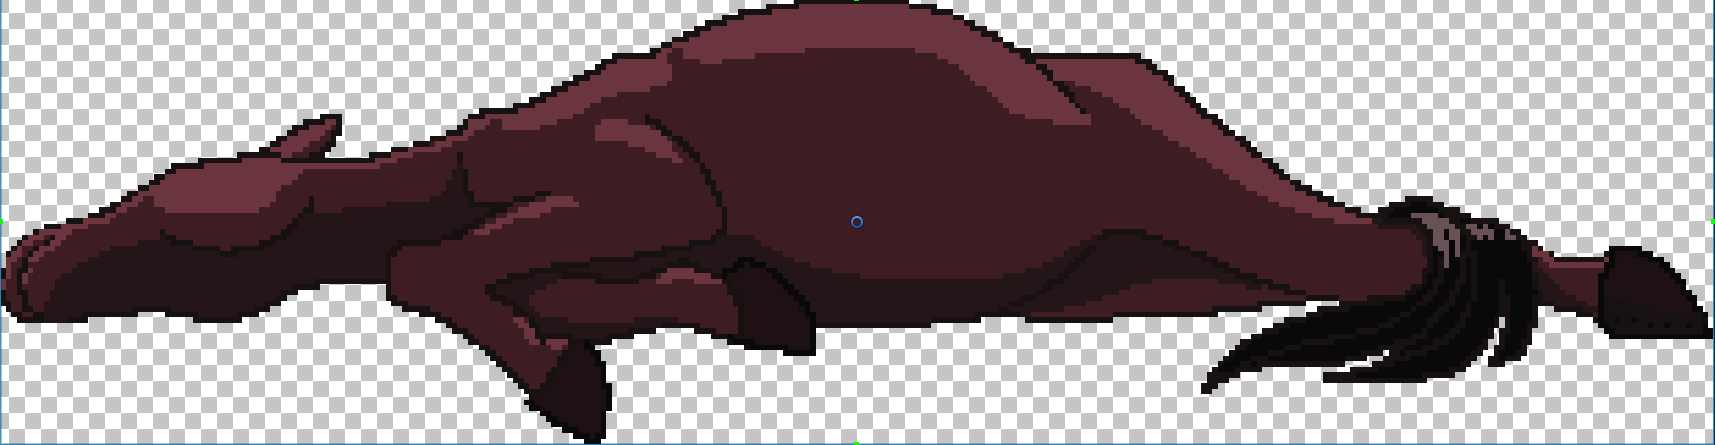
- Various fallen horse sprites for open plains
- Drawn by Ellen
- Falling wood barge platforms suspended by rope
- Release and fall behavior programmed by Diego Avena
- For the ropes, these make use of the 2D Hinge Joint components inside of Unity, which allow you to create chains!
- Sounds collected by Jon
- Release and fall behavior programmed by Diego Avena
Here is a vid of the explosive falling barge, which can be used to destroy hard to kill enemies:
Next steps:
Put the spirit forest world together! We have a very large set of goals written up, but to keep things short I will not share all those details here. Instead, here is a little sneak peek of what we will be adding into the game this month:
- An intense platforming challenge where the main character will chase after a wise dragon into the heavens!
- A series of small platforming challenges as the player follows a Kitsune
- New parries! Check out the vid of of one of these below:
- Some more awesome cinematic moments like a meeting with a dragon in the skies, a cutscene of a dragon blowing up a mountain as it breaks free to fly up!
Leave a comment
Log in with itch.io to leave a comment.